So, on my previous post Beach Bum one of the pictures is a list of things that I wanted to do before going to Korea.
Dyeing my hair was the first thing on the list.
So, I asked my mom, who was concerned that I would damage my hair but said yes anyways, then bought all the things that I needed aided by many of the YouTube videos I watched about dyeing hair and then did it.
This was my first time ever dyeing my hair my self and the first time my hair has ever been dyed so of course the color didn't turn out the way I wanted to. Being a beginner and all, I made some mistakes.
But, I do enjoy the way it turned out and here are the steps and products I used complete it!
Steps:
- Section off the area of hair you want to dye and apply coconut oil to it. I applied coconut oil to my hair and slept with it on in order to prevent damage to my hair such as loss of curl pattern or hair falling out after bleaching.
- Follow Directions on bleach kit. I purchased a bleach kit instead of buying the things separately because I figured it would be easier for me being new to bleaching and the kit having everything I need.
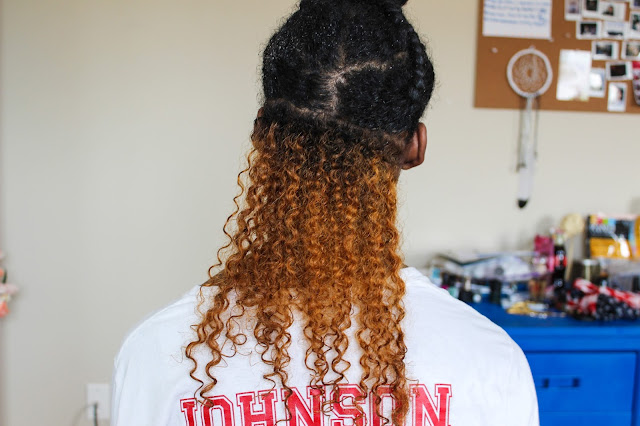
- Apply bleach to your hair, put on shower cap and leave it on for recommended amount of time depending on hair color. According to the bleach kit it recommended that I should keep the bleach on my hair for 60-90 min. I was scared to damage my hair so I didn't keep the bleach on my hair for that long. I also lost track of the time so I didn't know how long it had been on my hair.
- Wash out bleach using Shampoo and Conditioner.
- Wait for hair to be completely dry before applying color. Some people use blow dryers to speed up the process, but I didn't want to damage my hair even more in one day by applying heat to it so I pat it dry with a T-shirt and let it air dry.
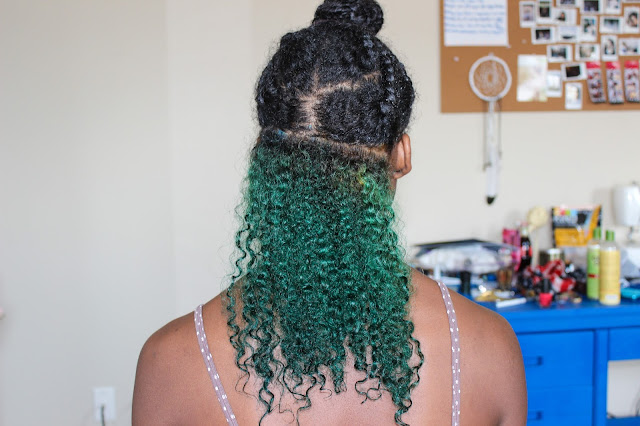
- Apply color to hair leave it in for recommended amount of time and put on shower cap. I left the color on my hair for about an hour.
- Rinse hair until water runs clear and apply any type of product that strengthens and moisturizes weak and damaged hair. I used the ion Repair Solution because it was near the hair dye and only a dollar.
Products:
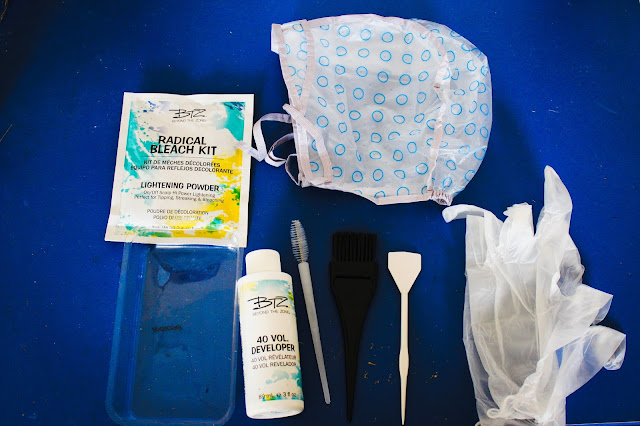
Beyond The Zone Radical Bleach Kit (see pic below of all the bleach kit contains)
Manic Panic Atomic Turquoise
ion Repair Solution
Black Reusable gloves
*All of the products I purchased from Sally's and I believe it was a total of approximately $25*
The biggest mistake I made was:
Not leaving the bleach on long enough.
If I did, the color of my hair would be less green and more of a lighter turquoise color.
The smaller mistakes were:
My part in my hair being off
and
Missing a tiny section of bleached hair when applying color.
But, there is basically no damage to my hair besides the back of my hair feeling a little bit dryer because of the bleach. My hair mostly still feels the same and the curl pattern has not really been affected at all.
  |
| Products |
 |
| All that is in the Bleach Kit |
 |
| After bleaching |
 |
| After applying color |

0 comments